
Missouri Star Quilt Binding Tutorial: A Comprehensive Plan
Missouri Star offers extensive quilting resources, including numerous free video tutorials focused on various binding techniques for quilts, pillows, and home décor projects.
Missouri Star Quilt Company has become a cornerstone for quilters seeking accessible and comprehensive educational resources. Their approach to quilt binding, readily available through their YouTube channel, demystifies the process for beginners while offering innovative techniques for experienced quilters.
The tutorials emphasize clear, step-by-step instructions, making even complex methods like mitered corners and hand binding achievable. Missouri Star doesn’t just show how to bind; they explain why certain techniques are used, fostering a deeper understanding of quilt construction.
Whether you prefer the speed of machine binding or the heirloom quality of hand binding, Missouri Star provides guidance. Their videos cover everything from fabric selection to troubleshooting common issues, ensuring a beautiful and durable finish for every quilt.

Why Choose Missouri Star Binding Techniques?
Missouri Star’s binding tutorials stand out due to their commitment to visual learning. The YouTube platform allows for detailed demonstrations, making it easier to grasp intricate steps compared to written instructions alone. This is particularly helpful for visual learners and those new to quilting.
Furthermore, Missouri Star offers a vast library of related quilting content, allowing you to seamlessly integrate binding techniques into broader quilt-making skills. Their tutorials are consistently updated, reflecting current trends and addressing common quilter challenges.
The company’s emphasis on quality tools and supplies, readily available through their website, complements the learning experience, ensuring you have everything needed for success. Missouri Star empowers quilters to achieve professional-looking results.
Understanding Binding Types
Missouri Star tutorials clearly differentiate between key binding approaches. Straight grain binding, cut along the fabric’s lengthwise or crosswise grain, is ideal for simpler quilts and offers stability. Conversely, bias binding, cut diagonally across the fabric, provides stretch, making it perfect for quilts with curved edges or those prone to shifting.
The choice between machine binding and hand binding also impacts the final look and feel. Machine binding is faster and more durable, while hand binding offers a more traditional, delicate finish. Missouri Star demonstrates both methods thoroughly.
Understanding these distinctions allows quilters to select the most appropriate binding type for their project, enhancing both its aesthetic appeal and longevity.
Straight Grain vs. Bias Binding
Missouri Star expertly explains the differences between straight and bias grain binding. Straight grain binding, cut parallel to the fabric’s threads, is economical and holds its shape well, best suited for quilts with straight edges. However, it lacks give.
Bias binding, cut at a 45-degree angle, offers significant stretch, conforming beautifully to curves and preventing puckering. This makes it ideal for circular quilts or those with scalloped borders. Missouri Star emphasizes that bias binding requires more fabric and precise cutting.
Choosing wisely depends on your quilt’s design; straight grain for stability, bias for flexibility.
Machine Binding vs. Hand Binding
Missouri Star clearly delineates the approaches of machine and hand binding. Machine binding is faster and efficient, utilizing a sewing machine to attach and secure the binding to the quilt. It’s perfect for quicker projects and offers a durable finish, though the back may show machine stitching.
Hand binding, a traditional method, involves meticulously stitching the binding to the back of the quilt by hand, creating an almost invisible finish. Missouri Star highlights its time-consuming nature but emphasizes the superior aesthetic and personalized touch.
The choice hinges on preference – speed versus artistry. Both methods yield beautiful results.

Essential Tools & Materials
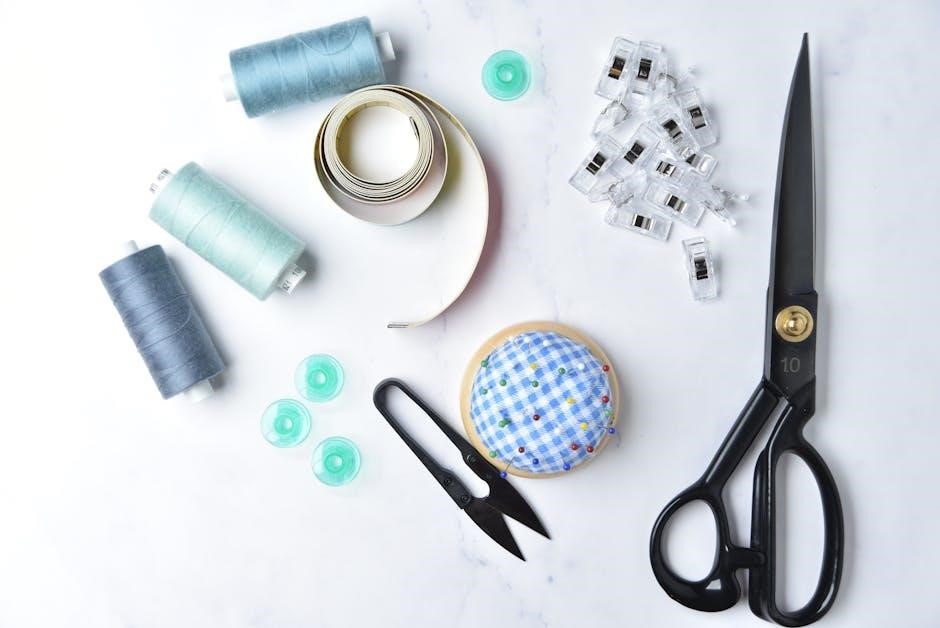
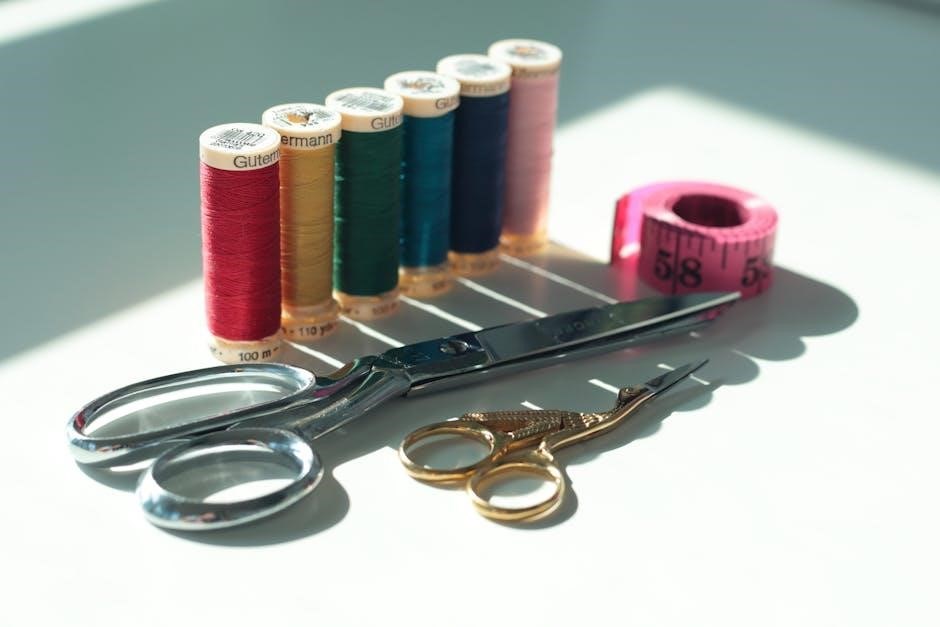
Missouri Star emphasizes having the right tools for successful quilt binding. Core necessities include high-quality quilting fabric – coordinating or contrasting – for the binding itself. Precision is paramount, demanding a rotary cutter, self-healing mat, and a clear acrylic ruler for accurate fabric measurements and cuts.
The debate between binding clips and pins is addressed; both secure binding to the quilt, but clips avoid piercing the fabric. A sewing machine (for machine binding) is crucial, alongside thread matching your binding fabric. Missouri Star also suggests a seam ripper for inevitable corrections!
Fabric Selection for Binding
Missouri Star highlights the importance of fabric choice for quilt binding. While coordinating fabrics create a seamless look, contrasting fabrics add a pop of color and definition. Consider the weight of your quilt fabric; the binding should be a similar weight to prevent puckering or distortion.
For durability, tightly woven fabrics are preferred. Missouri Star often demonstrates using scraps from the quilt itself for binding, reducing waste and ensuring a perfect match. Pre-washing your binding fabric is recommended to account for any shrinkage before attaching it to your finished quilt top.

Rotary Cutter, Mat & Ruler – Precision is Key
Missouri Star consistently emphasizes the necessity of precise cutting for successful quilt binding. A sharp rotary cutter, a self-healing cutting mat, and a clear acrylic ruler are fundamental tools. Accuracy in cutting binding strips ensures consistent width and a professional finish.
Using a ruler with clear markings and a non-slip backing is crucial. Missouri Star tutorials demonstrate techniques for safely and efficiently cutting fabric strips, highlighting the importance of keeping fingers clear of the blade’s path. Consistent strip width prevents issues during the binding process, resulting in a beautifully finished quilt.
Binding Clips vs. Pins
Missouri Star frequently discusses the debate between using binding clips and pins when attaching binding to a quilt. Clips are gaining popularity as they avoid piercing the fabric, potentially distorting the quilt top and are quicker to apply and remove. They are especially useful for quilts with batting that shifts easily.
However, pins remain a viable option, particularly for those accustomed to the method. Missouri Star tutorials showcase both techniques, advising quilters to choose based on personal preference and fabric type. Clips are excellent for beginners, while pins offer more control for intricate corners.
Preparing Your Binding Fabric
Missouri Star emphasizes meticulous fabric preparation for successful quilt binding. This begins with accurately calculating the required binding length, considering the quilt perimeter and adding extra for mitering corners and joining ends. Their tutorials demonstrate how to determine the precise amount needed, preventing shortages or excessive waste.
Next, cutting binding strips to consistent widths is crucial. Missouri Star recommends using a rotary cutter, mat, and ruler for precision. Finally, seamlessly joining strips is demonstrated, utilizing diagonal seams to minimize bulk and create a continuous binding length. Proper preparation ensures a smooth and professional finish.
Calculating Binding Length
Missouri Star’s tutorials detail a straightforward method for calculating binding length. First, measure the quilt’s perimeter by adding all four sides together. Then, add 10-12 inches to this total to account for mitering corners and the initial overlap for joining the binding ends.
For a more precise calculation, Missouri Star suggests adding an extra inch or two per corner, especially for thicker fabrics. This ensures sufficient material for neat miters. Remember to consider the width of your binding strips when estimating; wider strips require more fabric. Accurate calculation prevents frustrating shortages during the binding process.
Cutting Binding Strips – Accurate Widths
Missouri Star emphasizes the importance of consistently accurate binding strip widths. Typically, a 2.5-inch strip is cut from fabric, which then reduces to approximately 1/4 inch when folded in half. Using a rotary cutter, mat, and ruler is crucial for precision.
Missouri Star’s demonstrations show how to cut multiple strips simultaneously to save time, ensuring they remain parallel. Consistent width is vital for a smooth, even binding application. Any variations will be noticeable, especially at the corners. Double-check measurements frequently during the cutting process for professional results.
Joining Binding Strips – Seamless Connections
Missouri Star tutorials highlight the diagonal seam method for joining binding strips, creating virtually invisible connections. This technique avoids bulky intersections, ensuring a smooth flow around the quilt. Align the strips right sides together, then cut diagonally across both, creating two mirrored pairs.
Press the seams open, and then press them to one side. Stitch the pairs together to form a continuous binding length. Missouri Star stresses the importance of a precise 1/4-inch seam allowance for a clean finish. This method minimizes bulk and provides a professional, seamless look to your quilt binding.
Machine Binding: Step-by-Step Guide
Missouri Star’s machine binding tutorial begins with attaching the binding to the quilt front, typically using a ¼-inch seam allowance. Start several inches from a corner, leaving tails for joining. Consistent stitching is key for a professional appearance. Next, focus on mitered corners – a hallmark of quality binding.
Missouri Star demonstrates how to fold and press the binding at each corner to create a neat 45-degree angle. Finally, turn the binding to the quilt back and secure it with clips or pins. Machine stitch in the ditch from the front, catching the binding on the back for a clean, durable finish.
Attaching the Binding to the Quilt Front
Missouri Star emphasizes starting several inches away from a corner when attaching the binding to the quilt front, leaving sufficient tails for a clean join later. A consistent ¼-inch seam allowance is crucial throughout this process, ensuring a uniform border. Use a walking foot for even fabric feed, preventing puckering or stretching.
Missouri Star’s tutorials highlight the importance of pressing the binding as you go, creating a smooth, flat surface. Backstitch at the beginning and end of each seam to secure the binding. Maintain a steady stitching speed for a professional-looking attachment.
Mitered Corners – Achieving a Professional Finish
Missouri Star demonstrates a precise method for mitered corners: stop stitching ¼ inch from the corner, backstitch, and then fold the binding to create a 45-degree angle. This creates a neat fold that will form the miter. Finger press the fold firmly before continuing to stitch.
Missouri Star stresses the importance of accurate measurements and precise folding for a sharp miter. After folding, continue stitching from the edge of the fold, creating a clean, diagonal line. Trim any excess fabric close to the stitching line for a polished look. Practice makes perfect with mitered corners!
Turning & Securing the Binding to the Quilt Back
Missouri Star tutorials emphasize carefully turning the binding to the back of the quilt, ensuring a neat fold along the stitched line. They recommend using a binding clip or pin to hold the folded edge in place as you work your way around the quilt.
Missouri Star advocates for consistent stitching when securing the binding to the back. Machine binding typically involves stitching “in the ditch” – along the seam line on the quilt front – for an invisible finish. Hand binding requires a slip stitch, creating a nearly invisible securement.
Hand Binding: A Traditional Approach
Missouri Star presents hand binding as a classic technique offering a beautifully finished, durable edge. This method begins with basting the binding to the quilt back, temporarily holding it in place for precise stitching. They demonstrate the importance of using a consistent stitch length and tension for a professional look.
Missouri Star’s tutorials highlight the “invisible stitch” – a slip stitch – as the key to hand binding. This technique conceals the stitches within the binding fold, creating a seamless finish. Securing the ends neatly is also crucial, with Missouri Star showing how to bury the threads for a clean, lasting result.
Basting the Binding – Preparing for Hand Stitching
Missouri Star emphasizes that careful basting is foundational for successful hand binding. They recommend using curved safety pins or binding clips to evenly secure the binding to the quilt back. Pinning approximately every few inches ensures the fabric remains smooth and prevents shifting during the hand-stitching process.
Missouri Star’s tutorials demonstrate basting techniques that maintain consistent spacing between the binding edge and the quilt edge. This prevents puckering and ensures a neat, flat finish. Proper basting minimizes the need for adjustments later, streamlining the hand-stitching phase and contributing to a professional-looking quilt.
The Invisible Stitch – Mastering the Technique
Missouri Star champions the “invisible stitch,” a slip stitch that creates a nearly undetectable finish on the quilt back. Their tutorials meticulously demonstrate how to pick up a tiny amount of fabric from the binding and the quilt backing with each stitch.
Missouri Star stresses maintaining consistent stitch length and tension for a truly invisible effect. They advise using a coordinating thread color and a fine needle to further camouflage the stitches. Practice is key; Missouri Star’s videos offer close-up views and slow-motion demonstrations to help quilters master this essential hand-binding skill, resulting in a beautifully finished quilt.
Finishing the Hand Binding – Securing the Ends
Missouri Star emphasizes neatness when finishing hand binding, advocating for carefully concealed ends. Their tutorials showcase techniques for burying the tail of the binding thread within the quilt layers, ensuring a clean and professional look.
Missouri Star demonstrates how to overlap the beginning and ending binding strips slightly, then carefully trim the excess fabric before securing the final stitches. They recommend avoiding bulky knots and instead using a secure, flat finish. Proper ending techniques, as taught by Missouri Star, guarantee a durable and aesthetically pleasing quilt binding that will last for years.
Advanced Binding Techniques
Missouri Star expands beyond basic binding with tutorials on techniques like double binding, offering increased durability and a distinctive visual style. This method involves applying two layers of binding fabric, creating a robust and decorative edge.
Furthermore, Missouri Star showcases piping binding, a technique that incorporates a thin cord (piping) within the binding itself, adding texture and a refined finish. Their videos detail how to construct and apply piping, transforming a simple quilt edge into a statement piece. These advanced techniques, readily available through Missouri Star, elevate quilting projects to a professional level.
Double Binding – Adding Durability & Style
Missouri Star demonstrates that double binding isn’t merely aesthetic; it significantly enhances a quilt’s longevity, particularly for well-loved or frequently washed items. The process involves attaching two separate binding strips to the quilt edge, creating a thicker, more resilient border.
Missouri Star’s tutorials guide viewers through precise techniques for aligning and securing both layers, ensuring a neat and professional finish. This method allows for contrasting fabric choices, adding a unique design element. Double binding is ideal for quilts intended as heirlooms, offering both beauty and enduring quality, as expertly shown by Missouri Star.
Piping Binding – A Decorative Edge
Missouri Star showcases piping binding as a sophisticated technique to elevate quilt edges beyond standard finishes. This involves encasing a narrow cord – the piping – within the binding fabric, creating a raised, decorative trim. Missouri Star’s tutorials emphasize careful construction of the piping itself, ensuring consistent fullness and shape.
The process requires precise alignment and stitching to fully enclose the piping, resulting in a clean, professional look. Missouri Star demonstrates how piping binding adds texture and visual interest, transforming a simple quilt into a statement piece. It’s a fantastic way to highlight fabric patterns and add a touch of elegance.
Troubleshooting Common Binding Issues

Missouri Star acknowledges that even experienced quilters encounter challenges with binding. Bulky binding often arises from excessive fabric layers or incorrect pressing; Missouri Star advises careful trimming and consistent ¼” seam allowances. Uneven binding can stem from stretching during application, so gentle handling and pinning are crucial.
Wavy binding frequently indicates mismatched quilt top and binding lengths, or uneven tension while sewing. Missouri Star’s tutorials demonstrate techniques for easing in fullness and adjusting as you go. They stress the importance of a walking foot for even fabric feed and offer solutions for correcting minor imperfections, ensuring a beautifully finished quilt.
Dealing with Bulky Binding
Missouri Star identifies bulky binding as a frequent issue, often caused by too much fabric in the binding strips or inaccurate seam allowances. To combat this, precise ¼” seam allowances are paramount, and consistent pressing throughout the process is vital.
Carefully trim away excess fabric before attaching the binding to the quilt. Missouri Star’s tutorials emphasize the importance of a walking foot to ensure even fabric feed, preventing bunching. If bulkiness persists, consider reducing the width of your binding strips slightly. Proper ironing techniques, flattening seams, and mindful handling will yield a smoother, less cumbersome finish.
Fixing Uneven Binding

Missouri Star highlights that uneven binding frequently stems from stretching the fabric during application, particularly when machine binding. Maintaining consistent tension while sewing is crucial. If you notice unevenness, gently ease the binding fabric, avoiding pulling or stretching.
Strategic pinning or clipping can help redistribute the fabric and correct minor discrepancies. For more significant issues, carefully unpick the affected section and re-sew, paying close attention to fabric alignment. Missouri Star’s videos demonstrate techniques for subtly adjusting the binding to achieve a smooth, even edge, ensuring a professional-looking quilt finish.
Addressing Wavy Binding
Missouri Star identifies wavy binding as often resulting from uneven tension or insufficient pressing during the binding process. Ensure consistent pressure when ironing the binding to the front and back of the quilt. Gentle steam can help smooth out wrinkles and waves.
If waves persist, consider carefully re-stitching the binding, slightly easing the fabric as you sew. Avoid pulling the fabric taut, which exacerbates the issue. Missouri Star’s tutorials emphasize the importance of a balanced stitch length and consistent seam allowance. A final press, using a quilt basting spray, can further refine the finish and eliminate any remaining waviness.
Resources from Missouri Star Quilt Company
Missouri Star Quilt Company provides a wealth of free resources to enhance your binding skills. Their extensive YouTube channel (Missouri Star ౼ YouTube) features countless tutorials, demonstrating every binding technique imaginable, from basic machine binding to intricate piping and double binding.
Beyond videos, Missouri Star offers a comprehensive selection of binding tools and supplies, including specialized rulers, clips, and pressing tools, designed to ensure precision and efficiency. Their website showcases curated binding kits and a wide variety of binding fabrics, simplifying the process for quilters of all levels.
Missouri Star YouTube Tutorials – A Visual Guide
Missouri Star’s YouTube channel is a treasure trove for visual learners seeking mastery of quilt binding. Their dedicated binding playlist (Missouri Star ― YouTube) offers step-by-step demonstrations of every technique, catering to both beginners and experienced quilters.
These tutorials break down complex processes into manageable segments, providing clear visuals and detailed explanations. You’ll find guidance on machine binding, hand binding, mitered corners, and advanced techniques like double binding and piping. The channel’s approachable style and expert instruction make learning enjoyable and effective, fostering confidence in your quilting journey.
Missouri Star Binding Tools & Supplies
Missouri Star Quilt Company provides a comprehensive selection of tools and supplies specifically designed to simplify and enhance your quilt binding experience. From high-quality binding clips and rotary cutters to specialized rulers and basting pins, they offer everything needed for precise and efficient binding.
Their curated collection includes pre-cut binding strips in a variety of colors and patterns, saving you valuable time and ensuring accurate widths. Missouri Star also stocks essential fabrics suitable for binding, alongside helpful accessories like seam rippers and thread snips. Investing in these tools will elevate your binding results, achieving a professional finish with ease.